If you want to know how to floss, this step-by-step guide is for you. It shows you how to floss using conventional floss. And it shows you how to floss in different contexts – like with a brace or bridge. It also lists the pros and cons of different types of floss and suggests alternative ways to floss.
So, let’s get started.
First, it’s easy to get confused by the range of flosses available. There’s tufted, spongy, waxed and unwaxed, there are floss holders, floss threaders and dental tape.
The thing is: It ain’t what you choose but the way that you use it.
So, relax. What matters is the CORRECT TECHNIQUE. And the key to correct technique is knowing why you floss.
The bottom line? You floss to remove plaque and debris from areas your brush cannot reach: Tight spaces between the teeth and under the gum line. To do this correctly you need to remember…
The C shape
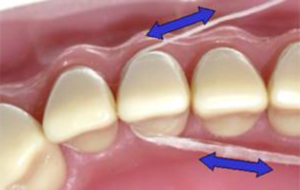
Keep this in mind. Because a common mistake made when flossing is to allow the floss to spring to the gum after passing it between the teeth. That’s going to hurt and put you off flossing. So, in summary:
- Wrap 18 inches (45cm) of floss around the middle finger of each hand.
- Then insert the floss around the first tooth in a C shape
- Now move the floss gently back and forth, gradually sliding it towards the gum line.
- When you reach the gum line, gently slide the floss back and forth in the space between the gum line and the tooth.
- Then pull the floss around the next tooth and repeat the process.
Believe it or not, many people do not floss properly. So, to avoid falling into the same trap follow this more detailed step by step guide to correct flossing.
How to floss properly – step by step
- How much floss to use? About 45 cm or 18 inches. Why that much floss? Because you want a clean section for each tooth.
- How to hold the floss? Wrap most of the floss around the middle finger of one hand and a small amount around the middle finger on the other. Leaving your index finger free means you can use it to guide the floss.
- How to floss? Hold about two inches between your fingers. Use your index finger to slide the floss between the teeth. Then pull the floss around one tooth in a C shape. Gently move the floss back and forward and slowly guide it towards the gum line. This will stop the floss springing free and hitting the gum which can be painful. When you reach the gum line, gently slide the floss back and forth in the space between the gum line and the tooth and over the surface of the tooth.
- How to continue flossing? Pull the floss around the next tooth and repeat the process. Unwind a fresh section of floss from the finger of one hand, whilst winding the used floss onto the other. You do because you don’t want to transfer plaque and debris from one tooth to another.
This method works with any kind of floss or dental tape. And you can start anywhere, upper or lower, front or back teeth.
The thing is to floss ALL your teeth, including the side of each of the teeth at the very back of your mouth.
How to floss with braces and how to floss with a retainer
It is important to know how to floss with braces and retainers. This is because you are more likely to get food particles trapped in the bands and wires. Therefore, you increase the risk of tooth decay and gum disease.
Retainers make it especially important to floss correctly as the cement used for bonding increases the risk of tartar build up. This is the nasty hard yellow stuff that is a combination of plaque and bacteria. Ugh.
The good news is, you CAN floss with braces and retainers… Water flossing is ideal in this situation. But if you want to go ahead and floss using conventional floss, be prepared to spend more time doing it.
It is time well invested. After all, if you’ve gone to the trouble and expense of getting orthodontics, you want your teeth to look their best when it’s time to get them removed!
Floss type matters here: waxed floss is less likely to split and snag in your braces. You can also use a floss threader to help thread the floss behind your brace wire.
How to floss with a brace or a retainer, step by step guide:
- How much floss to use? About 45 cm or 18 inches. Why that much floss? You want a clean section for each tooth.
- How to floss? Carefully thread the floss behind the main brace or retainer wire. Then pull the floss through so you have enough either side to floss normally. Now pull the floss around one tooth in a C shape. Gently move the floss back and forward and slowly guide it towards the gum line. This will stop the floss springing free and hitting the gum which can be painful. When you reach the gum line, gently slide the floss back and forth in the space between the gum line and the tooth and over the surface of the tooth. Then repeat the process with the tooth on the other side.
- How to continue flossing? Thread the floss behind the wire between the next pair of teeth and repeat the process. Unroll a fresh section of floss from the finger of one hand, whilst rolling the used floss onto the other. This prevents you transferring plaque and debris from one tooth to another.
How to floss with crowns and How to floss with a bridge
To see how to floss correctly in these situations, just watch this 50-second video below which also demonstrates how to use a floss threader.
Different types of floss
| Type | Description | Advantages | Disadvantages |
|---|---|---|---|
| Waxed Floss | Traditional string floss coated in wax. | Less likely to fray or split. Slides more easily between teeth. | Can hurt fingers as is very thin. Can only be used once |
| Unwaxed floss | Traditional string floss without a wax coating | More likely to fray or split and less easy to slide between teeth. | |
| Dental tape | Wide flat tape that has a waxed coating. | Cleans a larger surface area. | Less likely to hurt fingers but has other disadvantages of string floss. |
| Tufted / braided dental floss / Superfloss | Ordinary floss with wider segments that look like yarn. | Cleans a larger surface area and sometimes has a stiff end to thread under brace and retainer wires. | Fibers may catch on orthodontics and also only one-time use. |
| Floss holder | A small amount of floss suspended between two-pronged handle. | Useful for people who are not very dexterous or have a strong gag reflex. | If disposable, expensive as you should use a new section of floss for each tooth. |


Modern alternatives to flossing
If you can’t, or don’t want to, floss the old-fashioned way, then consider these options: Interdental brushes or Water flossing.
Interdental brushes

These brushes have bristled tips which come in different sizes. As a rule, the larger the gap between your teeth, the larger the bristled tip should be. This is because the brush should fit snugly between your teeth.
- Insert the brush gently between your teeth. If the brush does not fit it is not the correct size.
- Gently work the brush back and forward in the space between your teeth to remove plaque and food particles.
- Rinse the tip and repeat the process around your whole mouth.
Pros
- Less dexterity needed than with flossing.
- Easy to use with braces or retainers or crowns.
Cons
- More expensive than floss.
- Unless you sterilize the brush after each use you could transfer bacteria around the mouth (when flossing you use a clean section each time.)
- The thin wire within the brush could damage the gum if it bends or twists when using.
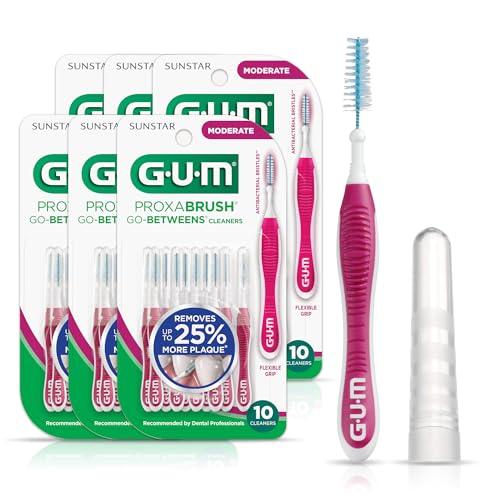
- DEEP CLEANING : GUM Proxabrush Go-Betweens feature soft bristles that slide between the teeth for a...
- MODERATE, 3612ECM6 : Our Moderate interdental brush between-teeth cleaners are specifically crafted to...
- COMPACT & REUSABLE : GUM dental picks are PERFECT for carrying in your purse or travel kit when you're on the...
Water Flossing

Not everyone likes flossing! It takes time to do properly. If you don’t do it often enough it can hurt and taste or smell unpleasant. Water flossers are game changers! A water floss aims a stream of water at your teeth. It has all the benefits of normal flossing because it removes particles of food and plaque from between your teeth and from between the tooth and gum line.
But here’s the thing:
Using a Water Flosser is quick: it takes less a minute to clean your whole mouth. It’s easy: no manual dexterity required! It’s effective: the pulsating action of a water flosser is more effective than flossing with string or tape while at the same time being gentler. And it gets deeper into the pockets between teeth and gums. It’s appropriate for people with orthodontic appliances.
And what’s more, it can also be fun.

- EASY & EFFECTIVE: The Waterpik Aquarius water flosser is the easy and most effective way to floss, removing up...
- TESTED & TRUSTED: Waterpik is clinically proven and the only water flosser brand to earn the American dental...
- ADVANCED TECHNOLOGY: features massage mode for gum stimulation, plus enhanced pressure with 10 settings...
Last update on 2026-05-12 / Affiliate links / Images from Amazon Product Advertising API
6 thoughts on “How to Floss Your Teeth”